Wiring your Guitar
At this point, you should have all of your wires running to the back of your guitar. Here is the circuit diagram that you want to mirror with the wiring of your guitar:
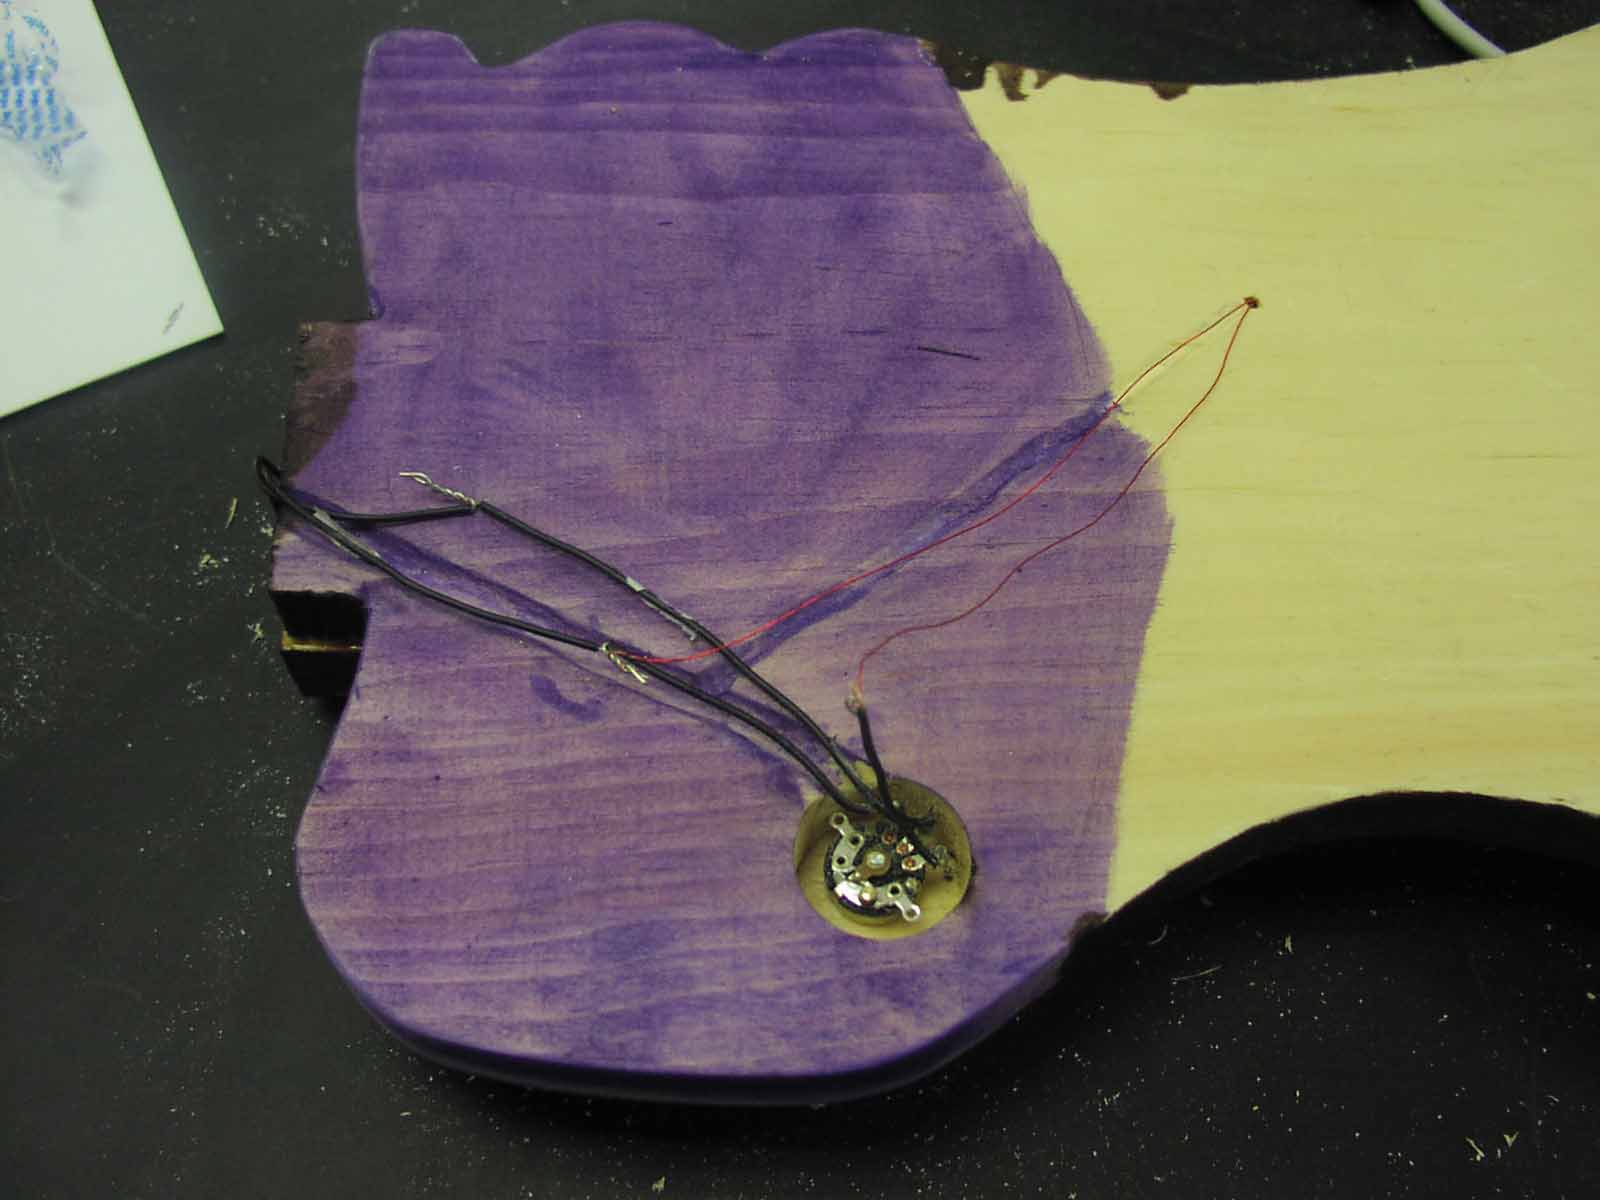
The middle plug on the potentiometer corresponds to the plug with the arrow. That plug should connect to the non-ground wire on the 1/4 in. jack. If you measure the resistance across the center lead and either of the other two leads of the potentiometer, the lead that corresponds to the left wire in the diagram is the one whose resistance starts high when you switch on the potentiometer and slowly decreases towards zero ohms as you continue to turn the knob. Here is a picture of the wiring of my guitar; click on it to enlarge it:
If you wired your guitar correctly, you can now connect it to a standard guitar amp, turn its volume all the way up, and hold a tuning fork over the pickup to hear a tone from the amp. If not, check your wiring, and make sure your connections are solid. You probably want to solder them, to make sure that they stay in place; I chose not to solder them because I like to mess around with circuitry, and once they're soldered you can't change them.
Click here to move on to the Stringing the Guitar section. Click here to return to the Building Pickup page.
Click here to return to the main project page